How to Draw a Girl – Easy Step-by-Step Tutorial for Beginners
Drawing a girl might seem challenging at first, but breaking the process into manageable steps makes it accessible even for beginners. With basic tools, an understanding of proportions, and some practice, anyone can create charming portraits and full-body illustrations.
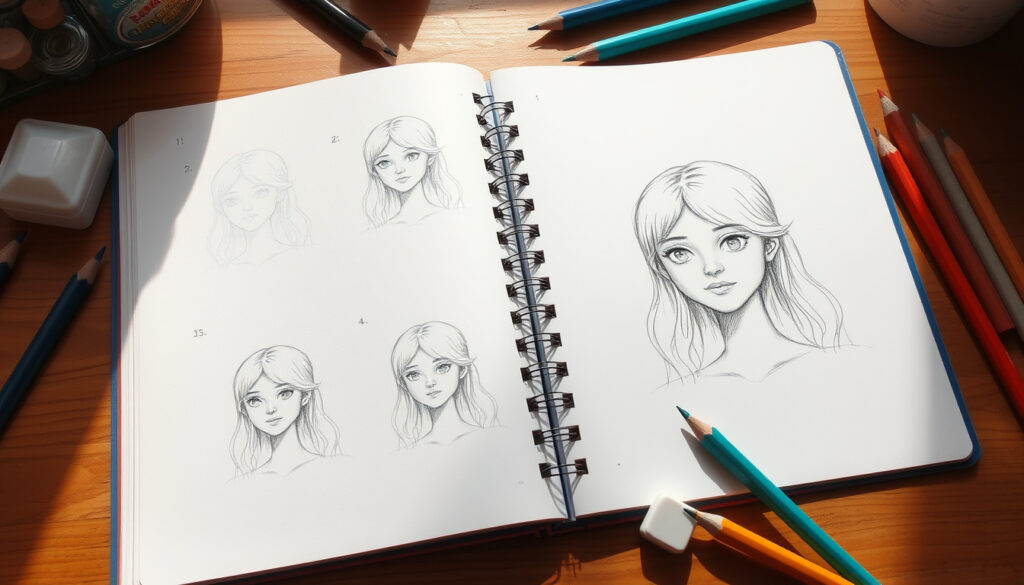
This guide covers everything from sketching the initial oval shape to adding realistic shading and cute details like large eyes and flowing hair. Whether you prefer a cute anime-inspired style or a more realistic approach, the principles remain the same: start simple, build proportions carefully, and layer details gradually.
The techniques presented here work well with standard pencils and paper, making them easy to practice at home without expensive equipment. Many artists recommend beginning with face drawings before progressing to full-body figures.
How to Draw a Girl Face Step by Step
The face forms the foundation of any girl drawing, and starting with the right shape makes all subsequent features easier to place accurately. Female faces begin with an oval or egg-shaped head rather than a perfect circle, which creates a more natural appearance.
H/HB pencil, eraser, smooth paper
Beginner friendly
20-30 minutes per sketch
Face, full body, cute cartoon
Essential Tips for Beginners
- Start with light H or HB pencil lines for guidelines that can be erased cleanly later
- Divide the head into six equal sections using horizontal guidelines
- Exaggerate eye size for a cute style; keep proportional for realistic portraits
- Use S-curves for hair and neck rather than straight lines
- Practice the oval head shape until it feels natural
- Keep reference materials nearby during early practice sessions
| Step | Focus Area | Helpful Tip |
|---|---|---|
| 1 | Head shape | Sketch an oval, then slice off the sides slightly |
| 2 | Guidelines | Draw vertical center line and three horizontal lines for eyes, nose, mouth |
| 3 | Eyes | Position between top two horizontal lines with one eye’s width spacing |
| 4 | Nose | Drop vertical lines from inner eye corners to mark width |
| 5 | Mouth | Place slightly wider than nose on the mouth guideline |
Drawing Realistic Girl Eyes
Eyes often become the focal point of a portrait, and capturing them well elevates the entire drawing. Place the eyes between the top two horizontal guidelines, spacing them so another eye’s width fits between them. Draw half-oval eyelids slightly above the eye line, then add irises and pupils as circles.
For cute anime-inspired eyes, exaggerate the size and add a prominent highlight at the top of each iris to create sparkle. Eyelashes should curve outward naturally from the eyelids.
Drawing Girl Hair
Hair frames the face and adds personality to your drawing. Start from a side part near the ears, then sweep the hair in long S-curves that flow over the head. Add volume by keeping lines loose rather than tightly clustered.
The hairline typically begins at eye-line height near the ears and can be drawn with gentle curves for a natural appearance. For long cute styles, extend the S-curves past the shoulders while maintaining the flow direction established at the part.
Always verify that ears align with the middle section of the head and that the hairline sits at approximately eye-line height. These small checks prevent common proportion errors that become difficult to fix later.
How to Draw a Girl Body and Proportions
Once the face feels comfortable, adding a body expands your creative possibilities. Female bodies follow different proportion rules than male figures, with narrower shoulders and wider hips creating a distinctive silhouette.
Understanding Head-to-Body Ratios
Artists commonly use the head as a unit of measurement for figure proportions. A typical teen or adult female stands approximately seven to eight heads tall. This ratio shifts with age: younger children measure four to five heads, while teenagers fall between six and seven heads.
When drawing, establish the head size first, then use it to measure the rest of the figure. Legs typically account for roughly half the total body height, while the torso occupies the remaining space.
Drawing the Torso and Limbs
The torso begins at the neck, which extends downward from the jawline. Draw the ribcage as an egg shape, then add the pelvis wider below the waist curve. Shoulders should slope gently downward to achieve a feminine appearance.
Arms extend to approximately mid-thigh length when hanging naturally. Legs require more length than the upper body and should be drawn with attention to the knee and ankle positions. Using S-curves throughout the body creates more dynamic, natural-looking poses rather than stiff standing positions.
Many beginners rush through body proportions before mastering facial features. Spending extra time on the face first often leads to better overall results when you eventually combine head and body in complete figure drawings.
Easy Ways to Draw a Cute Girl for Beginners
The cute style emphasizes large eyes, soft features, and simplified proportions that appeal to many artists. This approach remains forgiving for beginners while producing visually striking results.
Simplifying Features for Cuteness
Cute girl drawings typically exaggerate certain features while minimizing others. Eyes become significantly larger relative to the face, often taking up the upper quarter of the head. Noses may be reduced to small dots or subtle curves, while mouths often appear as gentle smiles or small lines.
The overall head shape for cute styles stays round and soft rather than oval. Cheekbones can be suggested with slight curves rather than defined bone structure. These simplifications make the drawing process more approachable while maintaining a distinctive style.
Choosing Between Cute and Realistic Styles
Both cute and realistic approaches require understanding the same fundamental proportions, but they emphasize different elements. Realistic portraits demand careful attention to subtle shadows and accurate muscle structure, while cute drawings allow for stylistic freedom and feature exaggeration.
Many artists practice both styles interchangeably, using cute exercises to build confidence before attempting more demanding realistic work. The choice ultimately depends on personal preference and intended use for the artwork.
Shading and Detailing Techniques for Girl Portraits
Shading transforms a flat sketch into a dimensional portrait with depth and visual interest. Building this skill requires understanding light sources, pencil pressure, and blending techniques.
Basic Shading Methods
After establishing the outline, shading begins by identifying where light hits the subject. Shade the opposite side of the face from the light source, creating natural shadows under the chin, along the nose, and beneath the cheekbones.
Hatching and cross-hatching work well with softer pencils like 2B or 4B. Apply lighter pressure initially, then layer additional strokes for darker areas. A tortillon or blending stump helps achieve smooth transitions in skin tones.
Adding Detail to Hair
Hair shading requires layering strands with varying pressure to create natural highlights and shadows. Draw light strokes in areas where light hits, then apply darker pressure in the shadowed folds and flowing curves.
Individual strands need not be drawn completely. Strategic gaps and varied line weights suggest volume and movement without overworking the surface. Following the natural S-curves established during the initial sketch helps maintain consistent flow.
Flat shading happens when artists apply uniform value across the entire drawing without establishing light and dark contrast. Resist the urge to shade everything equally; selective shading creates the illusion of three-dimensional form.
For smooth skin tones, use a tortillon rather than fingers. Finger oils can smudge graphite unevenly and damage paper texture over time. Clean blending tools produce more consistent results.
Step-by-Step Drawing Process
Following a clear sequence helps maintain focus and ensures no steps get skipped during the drawing process. Each stage builds upon the previous one, creating a solid foundation for the final artwork.
- Sketch the outline: Draw the head shape and body framework using light pencil strokes
- Add guidelines: Place vertical and horizontal lines to position facial features
- Draw features: Sketch eyes, nose, mouth, ears, and initial hair shape
- Define the body: Add neck, shoulders, torso, and limb structure
- Apply shading: Layer values starting light and building to darker areas
- Add details: Refine hair strands, eye highlights, and shadow areas
- Finalize: Erase remaining guidelines and clean up the contour
Proportions: What Works and What Remains Flexible
Understanding which proportions are fixed versus flexible helps artists adapt their work to different styles while maintaining believability. For those seeking additional proportion guidance, these concepts provide a solid framework for artistic growth.
| Established Information | Flexible Elements |
|---|---|
| Oval head shape for female faces | Eye size and exaggeration level |
| Eight-head ratio for adult figures | Personal interpretation of cute vs realistic |
| Guidelines divide face into sections | Hair style and length |
| Light source determines shading side | Pose and body angle |
| Ears align with mid-head | Expression and mouth style |
Why Drawing Practice Matters
Drawing improves through consistent practice rather than innate talent alone. Artists who dedicate regular time to sketching develop muscle memory for proportions, line quality, and shading techniques.
Beginners often benefit from working through reference materials, whether printed guides or face proportion resources. These tools provide visual benchmarks against which developing skills can be measured. Many artists recommend practicing on inexpensive paper initially, reserving better materials for completed pieces.
Progressing from simple face sketches to full figure drawings requires patience. Each skill builds upon previous ones, creating a cumulative foundation that supports increasingly complex work. Those interested in drawing male figures can apply similar principles after mastering the female proportions described here.
References and Drawing Resources
Established art instruction materials provide valuable guidance for developing drawing skills. Works like those found in foundational drawing textbooks offer structured approaches that complement practice routines.
Understanding basic proportions creates the framework for all successful figure drawing, regardless of the final style chosen.
Online resources and visual demonstrations supplement traditional instruction. Many artists share their techniques through video tutorials, allowing viewers to observe actual stroke patterns and timing. These resources prove particularly valuable when learning to draw female faces and understand feature placement. Exploring multiple drawing tutorials helps artists find approaches that resonate with their personal learning style.
Practice Makes Progress
Drawing a girl requires patience, proper tools, and step-by-step attention to proportions. Beginning with simple oval shapes and guidelines creates a foundation that supports increasingly detailed work. Whether pursuing cute anime styles or realistic portraits, the core techniques remain consistent.
Start with short practice sessions focused on individual features like eyes or mouths before attempting complete portraits. Gradually combine elements until full figure drawings feel manageable. With regular practice, the process becomes more intuitive and the results more satisfying. Those looking for structured learning paths can explore foundational drawing techniques to build essential skills systematically.
Frequently Asked Questions
How long does it take to learn how to draw a girl?
Most beginners see noticeable improvement within a few weeks of regular practice. Individual timelines vary based on time invested and natural aptitude, but consistent daily sketching accelerates progress significantly.
What type of paper works best for sketching girls?
Smooth, medium-weight paper between 90gsm and 120gsm works well for pencil sketching. Beginners can practice on less expensive paper initially, reserving better quality sheets for final pieces.
Should I use digital or traditional pencils for drawing?
Traditional pencil sketching builds stronger foundational skills because mistakes cannot be easily undone. Many artists recommend starting with physical pencils before transitioning to digital tools if that path interests them.
Why do my drawings look flat despite shading?
Flat shading usually indicates missing value gradation. Ensure you are creating distinct light, medium, and dark areas rather than applying uniform tone across the drawing. Check that shadows align with a consistent light source.
Can I draw cute girls without learning realistic proportions first?
Technically yes, but understanding realistic proportions makes cute styles more effective. Exaggeration works best when grounded in knowledge of what is being exaggerated. Basic proportion knowledge also helps when designs need to look intentional rather than accidentally distorted.
More related posts
 How to Deal with a Narcissist: Proven Strategies
 How to Use DisneyPlus.com Login/Begin to Activate Disney+ on TV
 Best Arepa de Choclo Near Me – Restaurants Delivery and Tips
 How Many Amendments Are There – 27 US Constitution Total
 Rolex GMT-Master II – Models, Prices, History Guide
 S&P 500 News: 2026 Forecasts & Buffett Views
 Cyber Monday Deals 2025: Ireland Black Friday Comparison
